Step 9 – Order Status Feedback File
This will create a CSV file consisting of the incoming Order Id and the Sage300 assigned Order Number which will then be uploaded back to the order system.
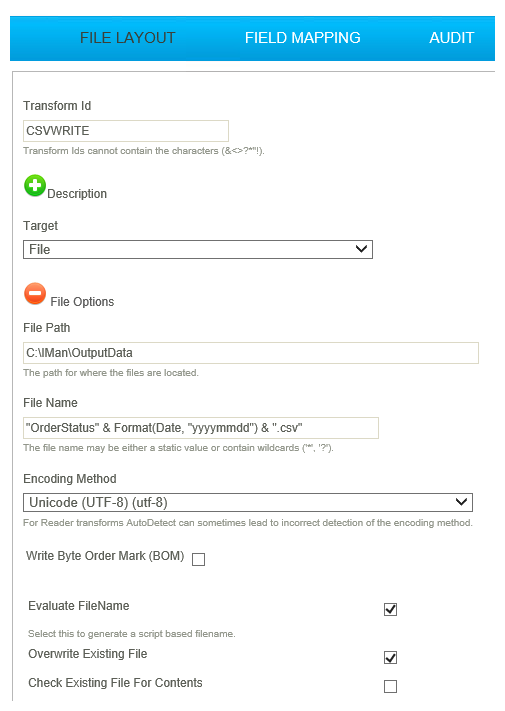
- On the main design screen drag a CSV Writer from the Writers group onto the palette. Connect it to end of the Sage300 Order import and double click to open the setup.
- Expand the File Options.

- File Name
- For writer transforms you can enter a simple formula to generate a filename.
- For training, enter: "OrderStatus" & Format(Date, "yyyymmdd") & ".csv"
- File Path
- For training, enter: C:\IMan\OutputData
- Encoding Method
- For training, select: Unicode (UTF-8) (utf-8)
- Evaluate Filename
- To have the value in the File Name field evaluated or not.
- For training: checked.
- Overwrite Existing File
- Each time the process is run a new file (with an uniquifier) will be created.
- For training: checked.
- Collapse the File Options and select the remaining options.
- Field Delimiter
- The character(s) used to separate the fields.
- For training, enter: ,
- Line delimiter
- For training, select: Windows Carriage Return & Linefeed (CRLF)
- Quote String Fields
- Select if you want string/text fields quoted.
- For training: unchecked
- Write Header Rows
- Select if you want the field names to appear at the top of the file.
- For training: checked
- Create file when no data
- For training: unchecked.
- Generate File Per Transaction
- If you wish to generate many files per transaction type e.g. If you had data with multiple batches, you may wish to generate a file per batch.
- For training: Leave blank
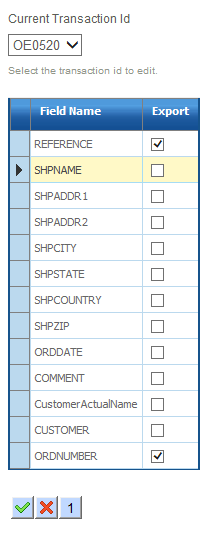
- Click the Field Mapping and press Edit to select/deselect the fields you wish to export.
- Deselect every field except REFERENCE and ORDNUMBER.

- Change to the OE0500 transaction and deselect ALL the fields.
- Refresh and then open your file.

- Press Apply to save the transform and close and then save the integration.