XML Datasources
Estimated time: 45 Mins
In this step we will create a ‘Reader’ transform to pull data from an XML file.
Introduction to XML
Method
Xml Data
Xml is a self-describing, hierarchical data format. Xml is extremely easy to work with since:
- Xml parsers validate the data syntax on load. Additional validation can be enforced through Xml schema(s).
- Fields & record types can be added without breaking the existing setup.
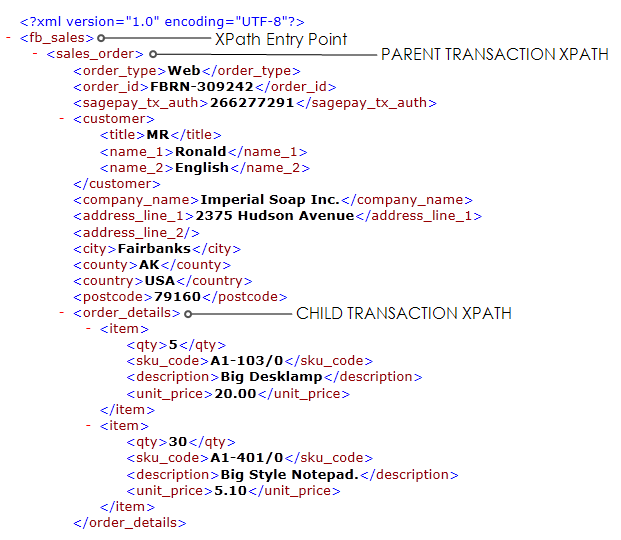
IMan Xml Parsing
XML is parsed into three sections:
- Entry Point
- This is a header node(s), before the first repeating node begins.
- Top Record Type
- The node(s) used to identify the top repeating transaction type.
- Children Transaction Type
- The node(s) used to denote the children records. An unlimited amount of children arranged in virtually an unlimited nesting (max. 64 children transactions).
The Xml Read transform requires you to define the data schema. The other Read types (CSV, Database, Excel and SageCRM) auto-parse their respective input data to determine their schema.
Setup an XML Reader
- Create a new integration.
- Click on the Transform Setup tab
- Click on Readers
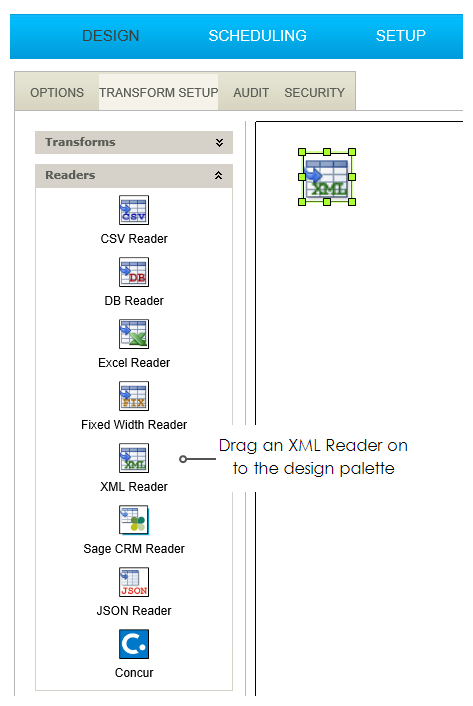
- Drag an XML Reader onto the design palette
- Double click to open the transform set up screen:

- Transform Id
- A unique and recognisable Id used to identify the transform.
- The value is displayed in the detail section of the audit report.
- Data Source
- Either File or Http.
- For training: File
- File Path
- A path to where the files are located.
- For training, enter: C:\IMan\InputData\Training
- File Name
- Can be either a static value or can contain the wildcards ‘*’ or ‘?’.
- For training, enter: XmlDatasourceInput.xml
- Encoding Method
- The text encoding is the numeric representation of a character. There are 100’s of encodings, IMan supports the most common
- Typically Xml files are UTF8 (the common web format); most text files are ASCII.
- For training: UTF-8
- Press the green tick to save.
- Pressing refresh will throw an error, as IMan we have not yet told IMan how to interrogate the XML data. This we will do in the next step.
Create Parent Transaction Type
Hierarchical data is supported intrinsically throughout IMan. Each transform must have 1 parent transaction type. The parent transaction type may have an unlimited amount of children transaction types, which can have children and so on.
- Open the field mapping tab, and enter the following:
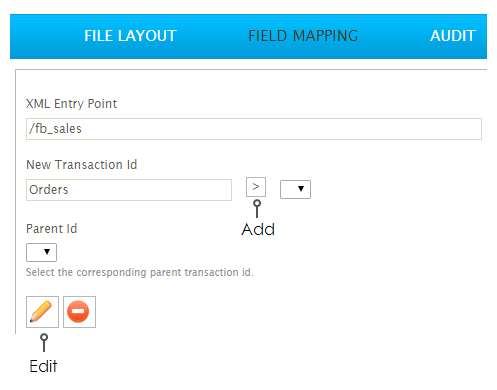
- XML entry point.
- /fb_sales
- Enter the parent record id and press the Add ‘>’ button.
- For training, enter: Orders
- Press the edit button to add fields to the record type:
- Enter the relative XPath of the transaction type.
- sales_order
- Double click the empty row at the top of the grid to create a new field:
- Enter a unique id for the field
- OrderType
- enter the nodes used to identify the value
- order_type
- change transaction type accordingly
- Text
- Press the green tick to save the field.
- Repeat for each field in the order. Open up the XML input data file if necessary.
The customer fields are represented in their own node; so be sure to enter the node path correctly).
- Enter the node(s) to indicate the repeating structure:
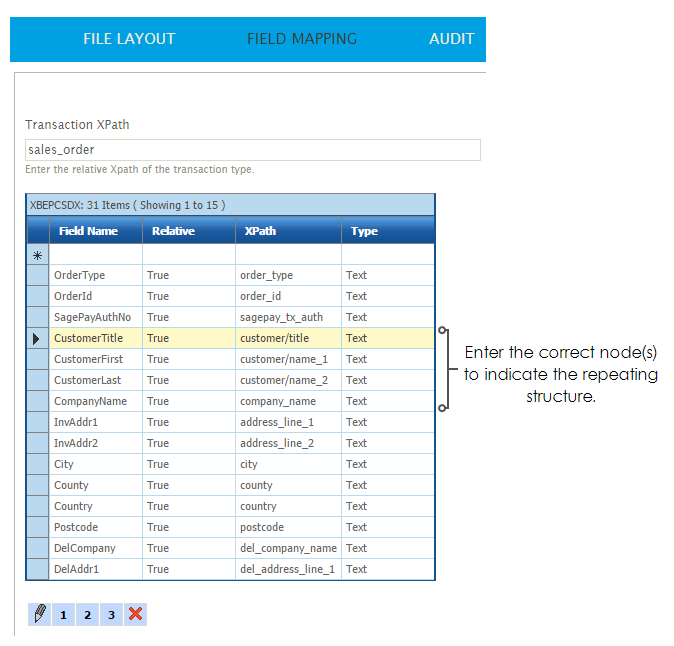
- Once the fields have been entered press Save. You can then (finally!) press Refresh to see if the data can be retrieved.
Create Children Transaction Types

- Enter a unique Id and press the add button.
- For nested structures ensure the parent transaction type is set correctly.
- Press the edit button to display the field list.
- Enter the relative XPath of the transaction type.
- Enter the Transaction XPath.
- Training: order_details/item
- Enter each of the fields, as before.
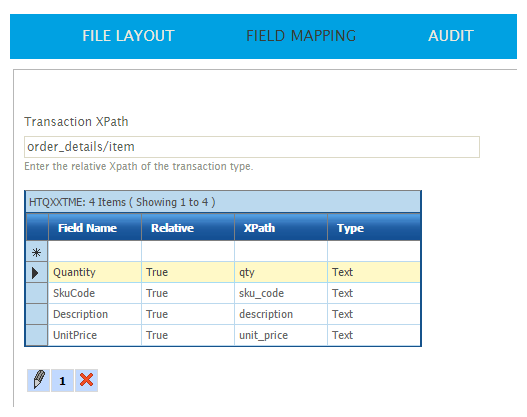
- Press save, and refresh:
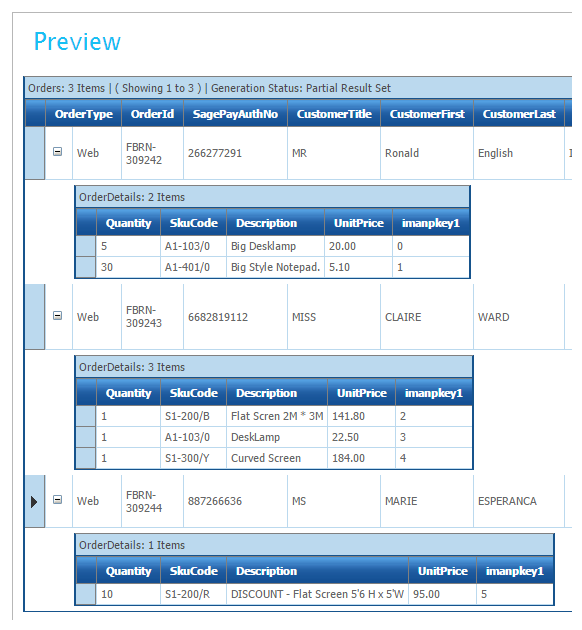
- Once this is complete, close the setup screen and press Save on the main design screen.