3 – Hierarchy Transform
When importing data, Sage200 and many other applications require data to be structured in the form the application expects; for transactional data this often means a header/detail or Hierarchical Data structure.
IMan provides three data-shaping transformations (Hierarchy, Flatten & Aggregate) to provide you with the ability to manipulate data into the desired form.
In this step we will use the Hierarchy transform to shape our ‘flat’ dataset into one which has a header/detail structure.
Add Hierarchy Transform

- Drag a Hierarchy transform onto the palette.
- Drag a connector onto the palette and connect it to the two transforms as shown above.
- The connection points will turn red when connected.
- Double click the Hierarchy transform to open its setup and assign it a recognisable name, then Save.
Transform > Field Mapping
- Click on the Field Mapping tab.
- The following steps will define the fields in the order header.
- For an order import, these are fields such as the customer name, address and order number.
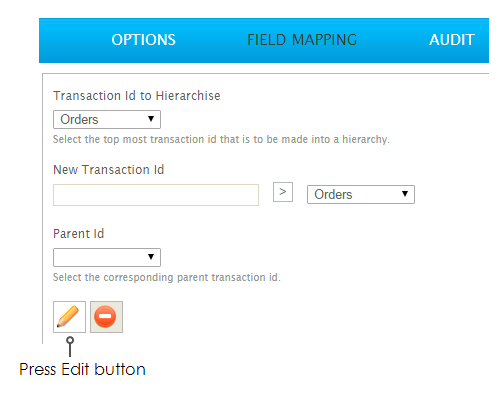
- Click the Edit button, to show the field list.

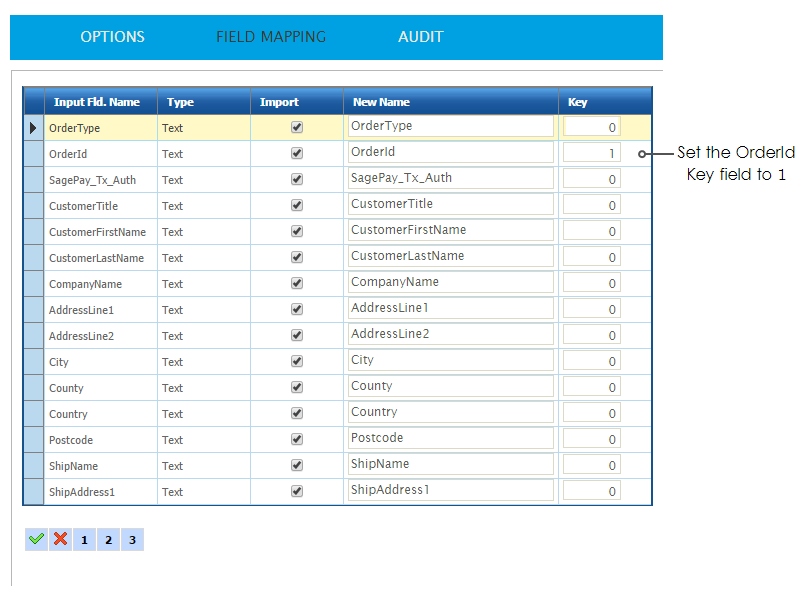
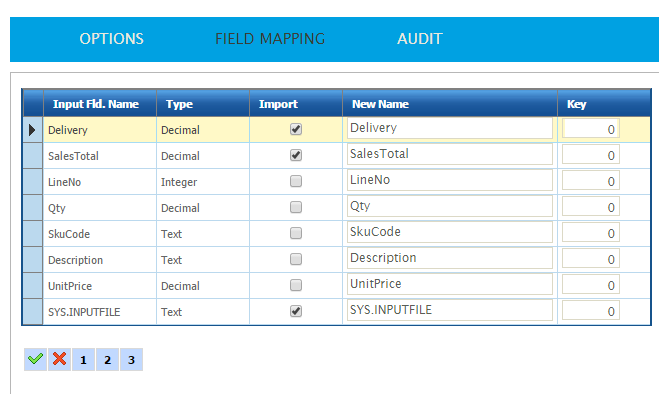
- By default all fields are checked, so you only need to deselect the detail line fields which are listed on the final page.
- Set the OrderId 'Key' field to 1.
- This will begin to construct the header/detail relationship.

- Click to page 3 and deselect the detail fields.

- Press the Green tick to save the grid.
- When asked if you want to delete the fields, press ‘Save’.

- Enter ‘OrderDetails’ into the New Transaction Id text box > press the Add button [>] to create a new transaction type.
- This new transaction type will be our details record.

- Press the edit button to show the field list.
- Select the fields for the details (those that were deselected from the 'Orders' transaction).
- On the first page, select ‘OrderId’ and set its Key to ‘1’.

- Move to page 3, select the detail fields, set the 'LineNo' key to ‘2’.
- This will create the second relationship for the detail records' organisation.
- This will create the second relationship for the detail records' organisation.

- Press the green tick and Save.
- Press Refresh.
- The header detail structure will appear in preview.
- Press the [+] button at the start of the row to see the detail records:

- Press 'Apply' and close the setup window.