Order Import
Sage300 O/E Order Import (SAMACCIMP)
These sample integrations are very typical of an order import from a web-commerce application. In a real scenario the data-source would be XML, however to simplify the integration we have substituted this for an Excel data-source.
The order import integration sample for Sage300:
- Import data from an Excel spreadsheet
- Apply transforms to the data
- Create/update sales ledger customers
- Create sales orders in the relevant application.
These integrations will create a corresponding payment. For Sage300 this will be a Prepayment (and A/R Receipt); for Sage200 it will be a Payment against Order.
Read Transform
The read transform is directed to the relevant file and here extracts data from the specified Excel spreadsheet.
Hierarchy Transform
To import data into Sage300 the data must be in a structure that corresponds to the type of data the Sage application expects.
Due to the nature of data within Sales / Orders, a hierarchical structure is required here.
The hierarchy transform can apply hierarchical structure to a data set. The transform can then be used to repeat this structure to create deeply nested children. Deeper nesting can be useful when adding fields such as shipping details.
For this sample integration, however, a structure 1 level deep is enough.
- To see the effect of the hierarchical transform:
- Press the Refresh button on the Field Mapping tab > click '+' to expand the record.
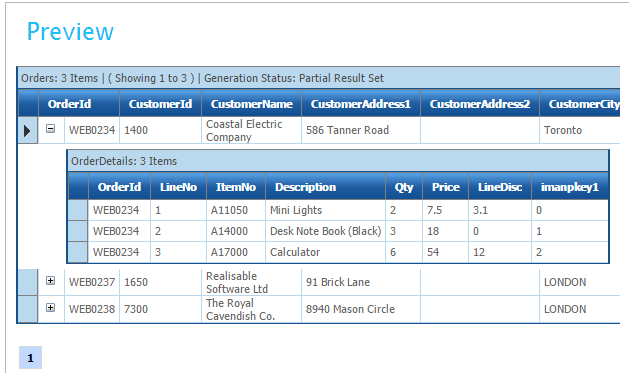
- To view the hierarchical transform setup for the selected transaction type (in this case, 'Orders'):
- Press the 'Edit' button (pencil).
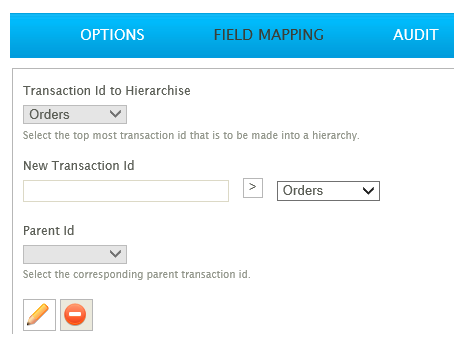
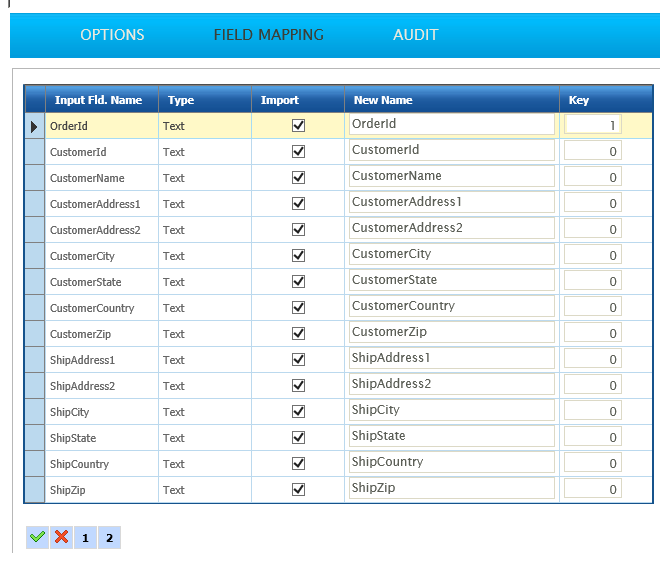
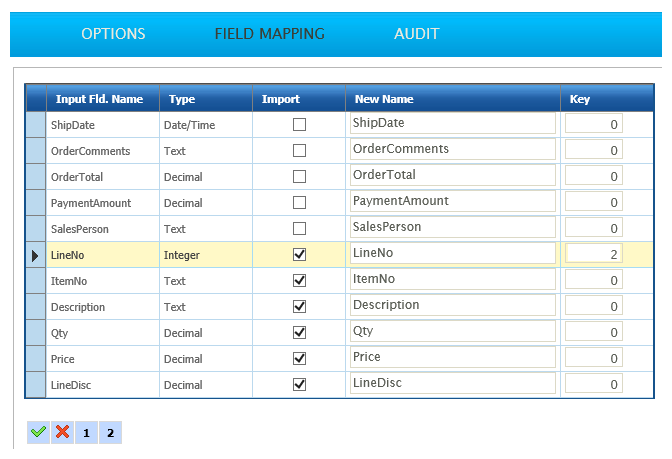
- In the screenshot below:
- The import check box indicates which fields are to be included in the resultant 'Orders' transaction type.
- The Key column is used to specify the field(s) that will be used to define the relationship between the transaction types.
Example
The 'Order Id' field uniquely identifies each 'Orders' transaction.
- Press either the green tick or the red cross to return to the previous screen.
- Then, to view the child transaction type setup:
- Change the drop-down from 'Orders' to 'OrderDetails'
- Press Edit.
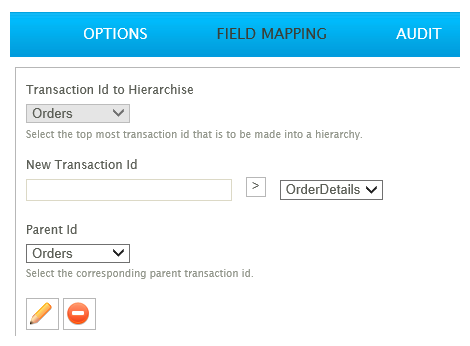
- This is where the Key field becomes important. To get the correct structure, make sure:
- The first page of fields has only the ‘Order Id’ import box selected, with Key column set to 1.
- The second page has only the detail fields selected, with the ‘LineNo’ Key value set to 2.
Map Transform
The Map transform allows you to apply an expression to each field. The expression can be either a static value, or a formula. A formula will manipulate the value of the selected field.
Due to the Map transform's flexibility, almost every job has one.
We recommend that a Map transform is inserted into every integration even if it is not initially required, as it will make future changes and maintenance much easier.
VBScript
VBScript is the underlying language for formulae within IMan.
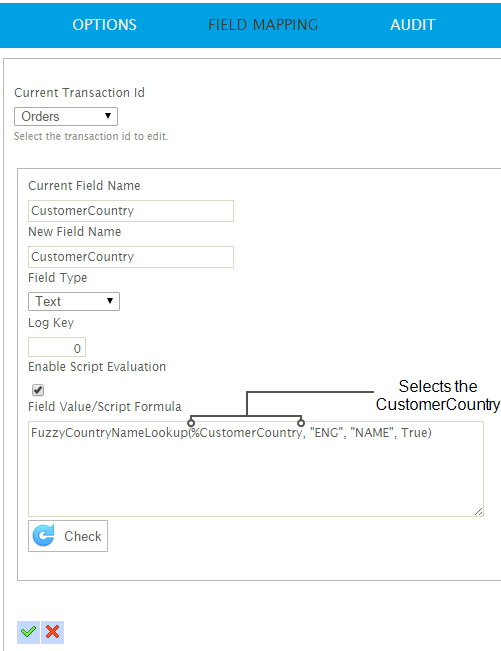
IMan augments VBscript by allowing fields from the dataset to be referenced, prefixing the field name with a percentage ‘%’ sign to indicate the field reference, as shown below.
Example
The function uses the FuzzyCountryNameLookup function, normalising the CountryName field to make it consistent when it is imported.
- To view the results of Map transform press the 'Refresh' button on the Field Mapping tab.
- On refresh, there should be several new fields added to the data set.
Connector Transforms
The connector transform defines how the dataset fields are mapped into the application.
Each of the connector transforms use a common setup screen.
Options Tab
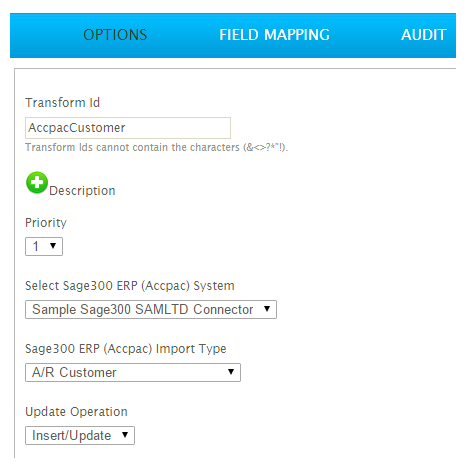
The Options tab defines:
- The System to import into.
- The type of data that is being imported.
- How updates are made.
Field Mapping Tab
The Field Mapping tab defines:
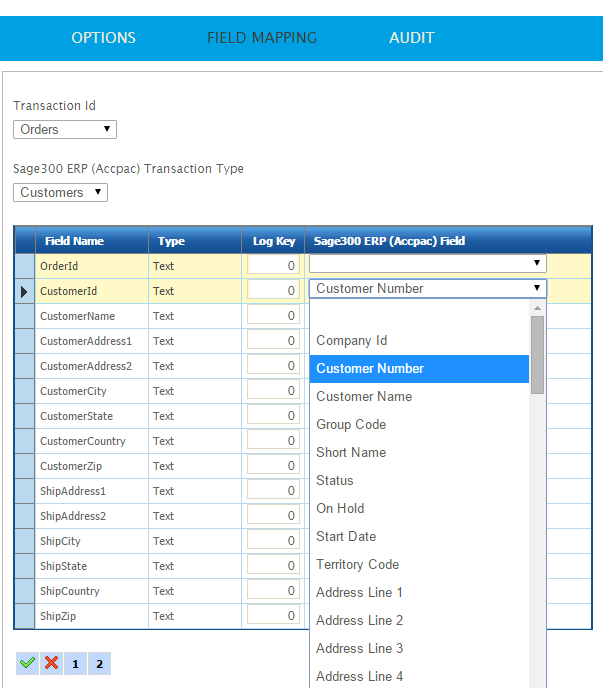
- How the transactions and fields are mapped to the ‘Import Type’ selected on the Options tab.
- To map the fields:
- Press the Edit button
- Select the field from the field drop-down.
For the ‘Orders’ connector:
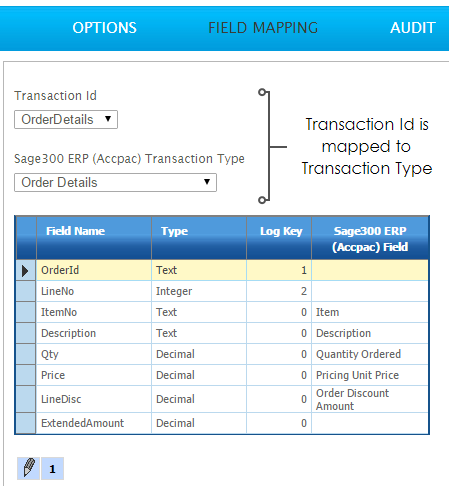
- The Transaction Id dropdown is matched against the Transaction type of the Import Type.
Example
In the screenshot below, the ‘OrderDetails’ transaction id is matched against the ‘Order Details’ transaction type of the Sales Order Import type.
- Pressing Refresh will import the transactions into Sage300.
- When the import is complete:
- Scroll the preview area to the right and you will find the Order Number field populated with Sage300’s auto-generated value.

CSV Write Transform
IMan has facility to write to a number of data formats including CSV/Text, Xml, Excel & ODBC/OleDb databases.
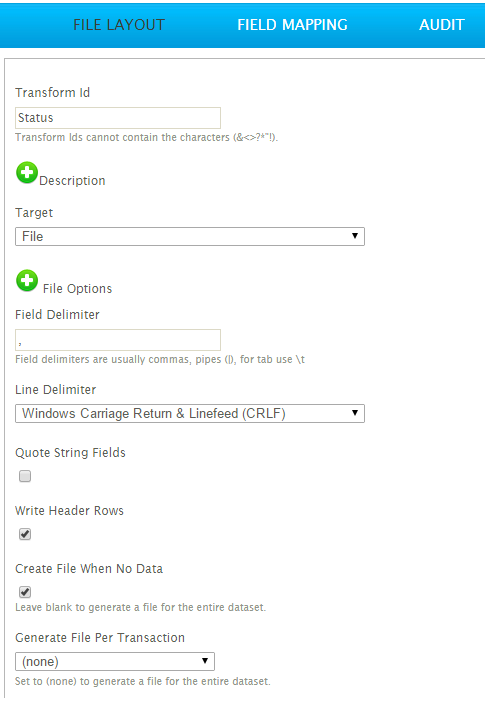
This transform exports the results of the order import to a CSV file.
This type of operation is often required to update the 'data source' application with a flag or identifier (such as an auto-generated Order number or entry reference) to indicate that the transaction has been successfully processed.
Example
- Press Refresh to generate the file.
- The file will be created in the Folder selected through the File Path field in the File Options:
