Step 2 – Excel Read Transform
In this step we will set up a Reader transform to pull data from an Excel file.
Design > Transform Setup
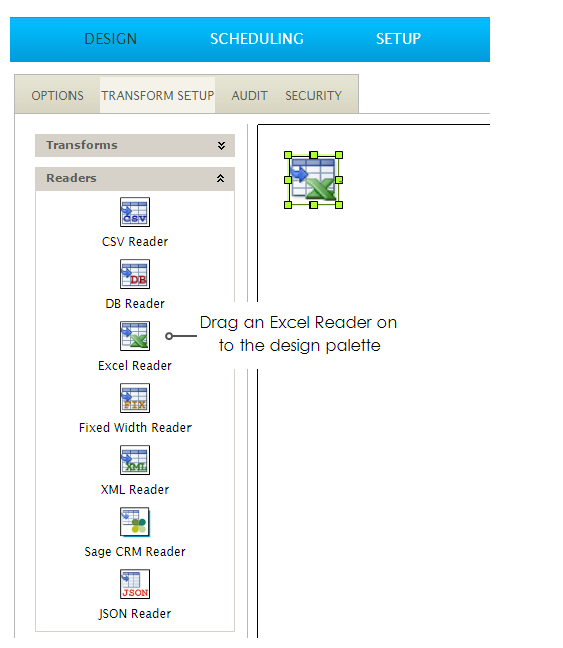
- Click on the Transform Setup tab.
- Click on Readers.
- Drag an Excel Reader onto the design palette.

Transform > File Layout
- Double click the Excel icon to open the transform setup screen and configure the transform:

- Transform Id
- A unique Id used to identify the transform. The value is displayed in the detail section of the audit report.
- For Training, enter: Excel Read.
- Data Source
- For training, choose: File.
- File Path
- A path to where the files are located.
- For training, enter: <your chosen file directory>\InputData\Training
- File Name
- Can be either a static value or can contain the wildcards ‘*’ or ‘?’.
- For training, enter: OrdersFile.xlsx
- Worksheet Id
- The worksheet id refers to the worksheet where the data is located.
- It can be referred by name, or by index, where the index starts at 0 (representing the first worksheet).
- For training, enter: 0
- Header Rows
- The number of rows containing ‘header’ text. In this example, there is one header row, containing the field names
- For training, enter: 1
- Mapping Style
- If you leave as Field Heading, the field names will be interpreted from the row(s) preceding where the data begins, i.e. the header row(s).
- For training: Leave 'Field Heading' selected.
- Press Refresh.
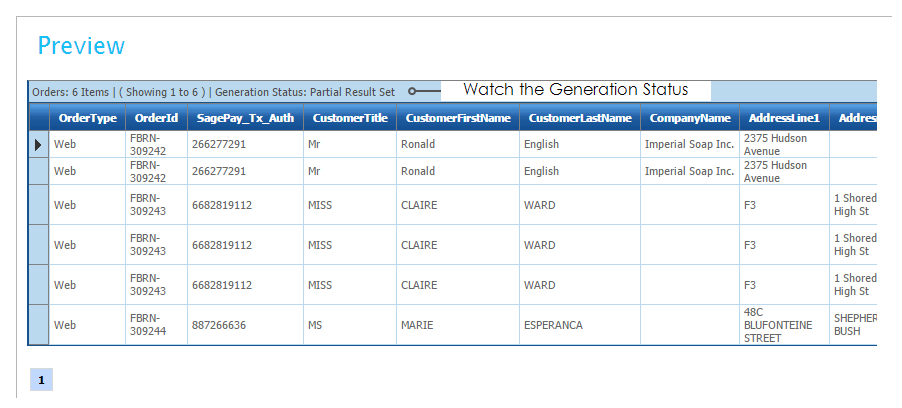
- On the hand right pane of the screen will display the file.
- Every screen except for ‘Tasks’ displays a live preview of the data being processed.
It’s important to note the Generation Status. Due to the asynchronous nature of processing you often need to press the Refresh twice.

Transform > Field Mapping
In this step we are going to alter some the field types.
You don’t strictly need to alter the field types as IMan will attempt to convert them where necessary, but it’s good housekeeping, and will stop you from running into issues later!
- Click the Field Mapping tab.
- Rename the Transaction Id from ‘Record’ to ‘Orders’.

- Press 'Apply'.
- Click the edit button at the bottom of the grid.

- Find the below field types, and set them as follows:
| Field Name | Set Type |
|---|---|
| AssemblyCharge | Decimal |
| TwoManDeliverySupplement | Decimal |
| Delivery | Decimal |
| SalesTotal | Decimal |
| LineNo | Integer |
| Qty | Decimal |
| UnitPrice | Decimal |
- Press the Green tick at the bottom of the grid to save the changes.
- Close the setup window.