Installing Realisable IMan
Get IMan installed with these steps:
- Start the IMan installer by running the IManInstaller.msi file.
You may receive an error if User Access Control (UAC) is enabled on the workstation or server.
To fix, run the accompanying setup.exe file (bundled with the installer) as Administrator.
To fix, run the accompanying setup.exe file (bundled with the installer) as Administrator.
- When prompted, press 'Next' to start the installation.
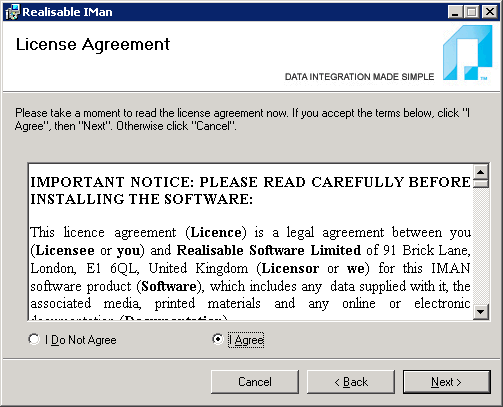
- Accept the license agreement (rejecting will cancel installation).

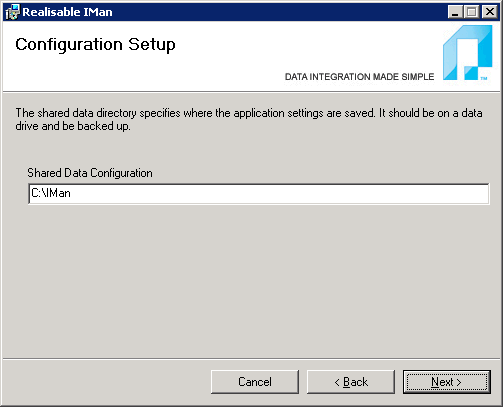
- Enter a directory location to store the IMan configuration files, according to the following:
- The directory should have a path that is local to the machine.
- It is recommended that the path be a subdirectory to the root of a drive, and be named IMan, as shown below.

This folder contains the job configuration files and requires backing up.
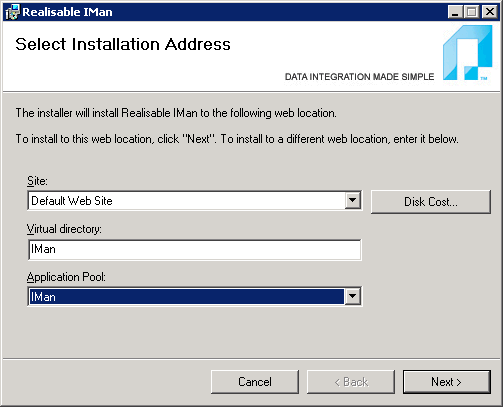
- Select the Website, Virtual Path and Application Pool the web interface of IMan will use:

- Site
- This is your chosen Web Site defined in your IIS Manager.
- Virtual Path
Example

- Application Pool
- The application pool is a set of processes that run in IIS.
We recommend that IMan is allocated its own Applicatin Pool (see Creating IMan IIS Application Pool).
After the installation is complete, there are several configuration steps required before IMan can be used. Please see Setting Up IMan for details.